Step by step
Open Export As
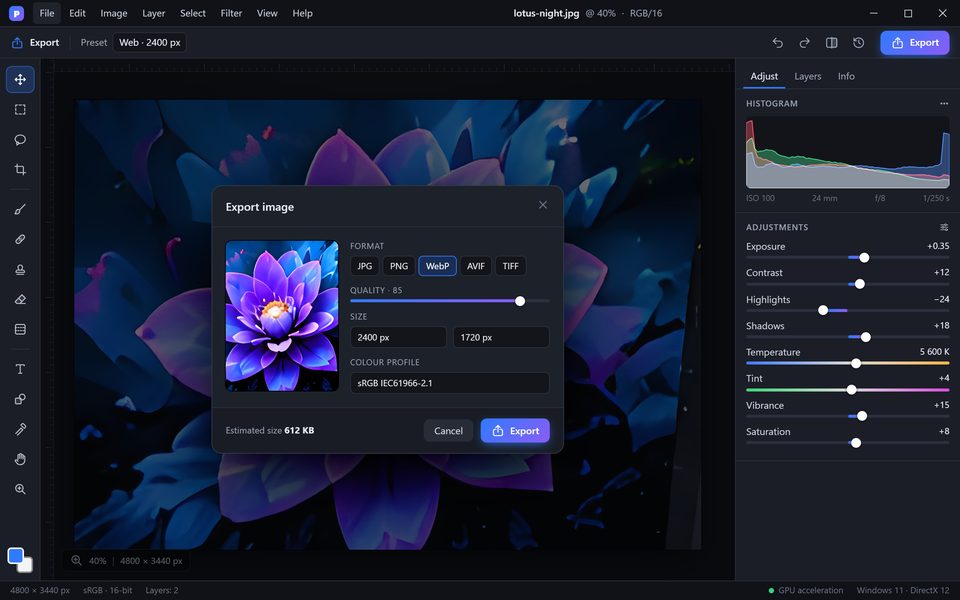
Choose File > Export As or press Alt+Shift+Ctrl+W. The dialog shows a live preview of the exported image.
Pick the format
WebP and AVIF give the smallest files for websites, JPG works everywhere, PNG keeps transparency and TIFF is best for print and archiving.
Set size and quality
Enter the final width — for example 2400 px for a full-width web image. Lower the quality until the estimated size fits your budget while the preview still looks clean.
Check the colour profile
Use sRGB for screens. For print, ask your print service for their profile and check the result with View > Proof Colours before exporting.
Save a preset
Click "Save preset" to reuse the settings, or run them in File > Automate > Batch to export a whole folder at once.
Tips for better results
- Export web images at the size they are displayed — not larger.
- Keep a full-resolution TIFF or PSD as your master file.
- Use the Image Processor to create several sizes in one go.