Step by step
Add an adjustment layer
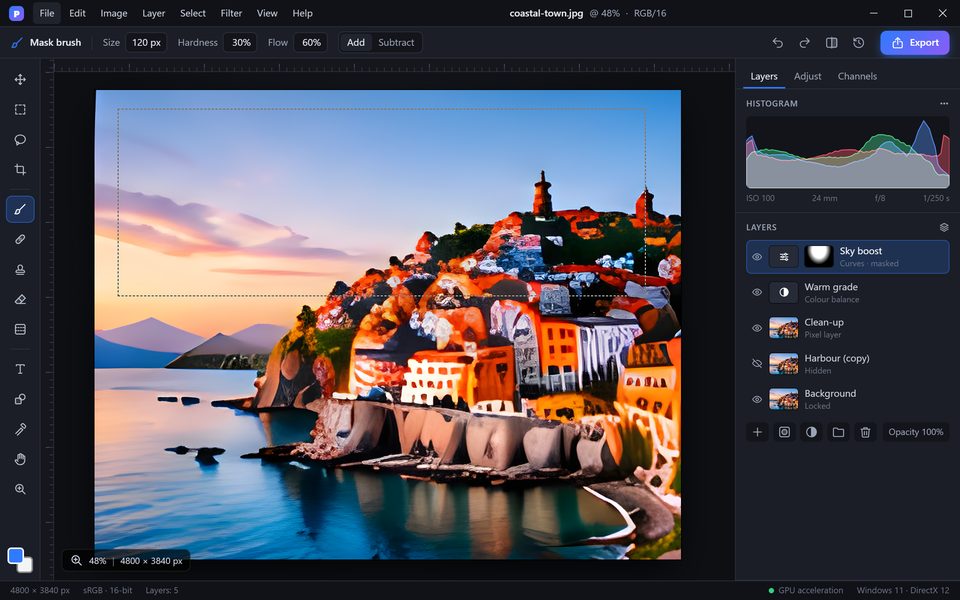
In the Layers panel click the half-filled circle icon and choose Curves. A new adjustment layer appears above the photo with a white mask, so the effect applies everywhere.
Shape the tone
Drag the curve: lift the middle to brighten, pull the lower part down for deeper shadows. The photo updates live.
Limit the effect with a mask
With the adjustment layer selected choose Select > Sky (or Select > Subject). PixelForge builds the selection and turns it into the layer mask automatically.
Paint the mask
Choose a soft brush. Black hides the effect, white reveals it and grey makes it partial. Press X to swap the colours quickly.
Fine-tune
Change the layer opacity or blend mode, double-click the adjustment to edit it again, or Alt-click the mask thumbnail to see the mask itself.
Tips for better results
- Name your layers — complex edits stay readable.
- Group related layers with Ctrl+G and mask the whole group at once.
- Use the Luminosity blend mode on Curves to change brightness without shifting colours.