Step by step
Prepare the photo
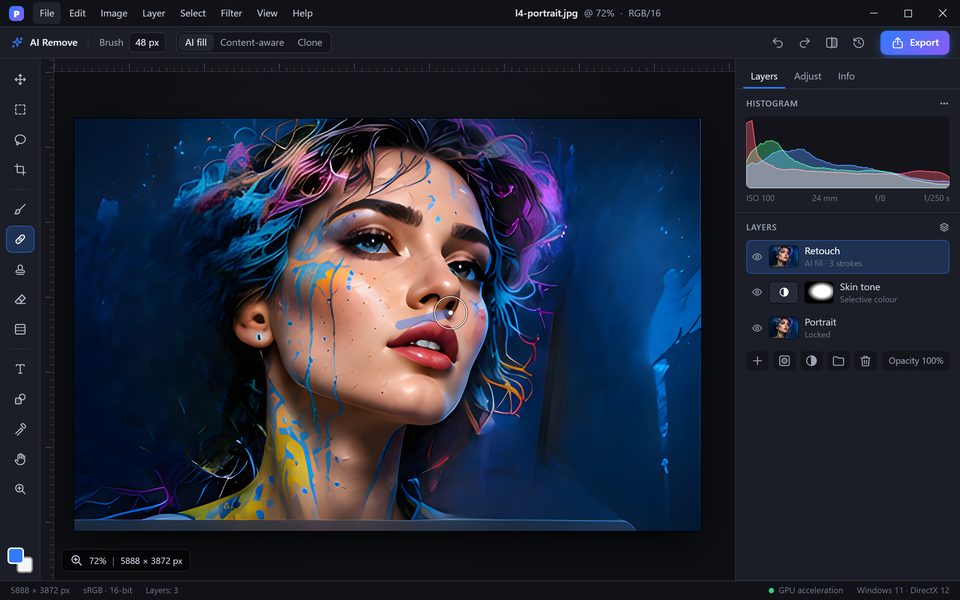
Open the image with File > Open (Ctrl+O). Add an empty layer with Ctrl+Shift+N and name it "Clean-up". All repairs go on this layer, so the original stays intact underneath.
Paint over the object
Select AI Remove (J) and turn on "Sample all layers" in the options bar. Make the brush slightly larger than the object and paint over it in one stroke, including its shadow and reflection.
Let PixelForge rebuild the area
When you release the mouse, PixelForge analyses the surrounding texture, light and perspective and fills the area on the Clean-up layer.
Refine the edges
For small leftovers switch to the Healing Brush or the Clone Stamp. Lower the brush hardness for soft areas such as sky or skin.
Compare and export
Toggle the eye icon of the Clean-up layer to compare before and after, then save the result with File > Export As.
Tips for better results
- Remove large objects in several smaller strokes for more natural results.
- Include shadows and reflections in the stroke — otherwise they stay visible.
- For straight structures such as walls, finish with the Clone Stamp along the edge.